
All hail the FPP!
If you follow the Warhammer Fantasy community on Twitter, you'll probably be aware of the vast range of opinions on painting that exist. Some feel that it is something that has to be done only when absolutely necessary, and feel that requiring anything more than a basic paint job to attend a tournament is sacrilege. Then there are those that have huge amounts of painting skill, that can produce something amazing everyday before breakfast and that see even the stringiest painting points as a right rather than a privilege!
I'm somewhere in the middle. There are times when the only way you will get me to pick up a brush is to have a tournament the next day that requires a minimum painting requirement. At other times, I really enjoy it and try to make every model as good as I can, spending ages doing it too. I've just gone through a period where the latter has been the case, and it all started with a Dragon.
Zombie Dragon

You have to love a Mother and her Dragon
I eventually finished the Dragon I wanted to take to Battlefield Birmingham in February, and I really enjoyed painting it. It was, and still is, the biggest model I have ever painted, and despite my reservations at the start of the project I really enjoyed the challenge. The first step of this was to put the model together, and this in itself was a massive undertaking. The model is shown in one of my first posts regarding the Battlefield Birmingham event, and looks very impressive even with no paint on. I decided to leave the wings off whilst I painted the model, helping me reach the whole model but meaning that attaching them wouldn't be as strong as if I had done them first. Still, I thought the ease in painting would make up for this.
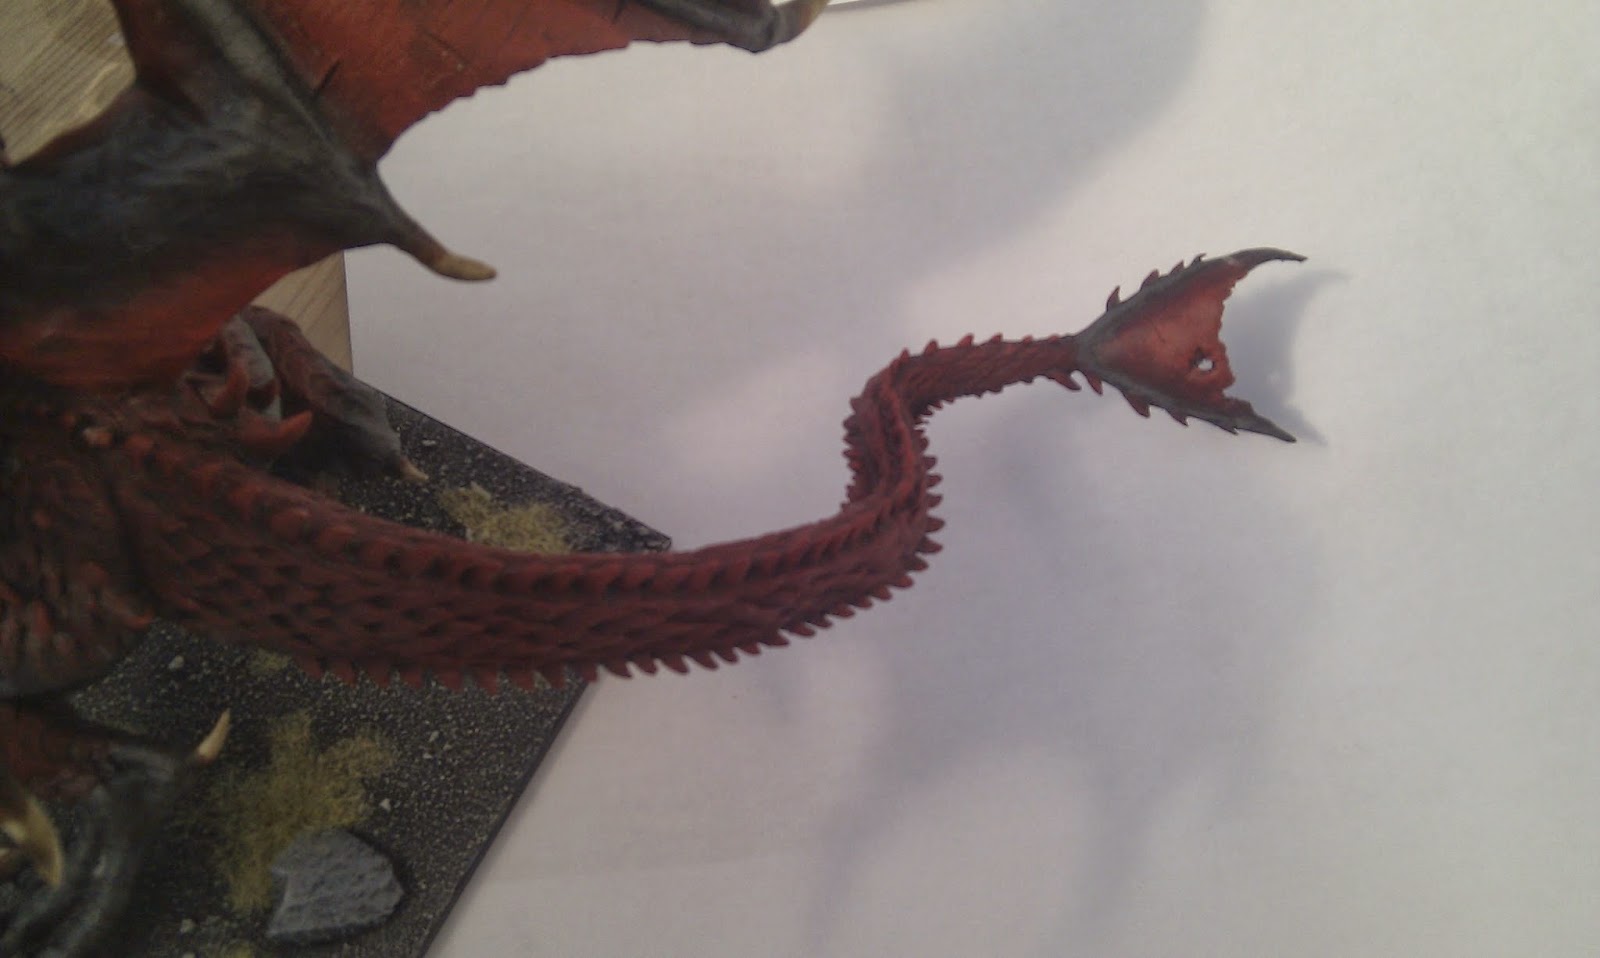
I wanted the model to bring back recollections of Drogon from the Game of Thrones TV show, so the image above was my starting point. A black undercoat and several coats of very dark red saw the model reach the point shown in the photo below.
(Quick note on photography - most of these photos were taken with my phone camera for Twitter, and I've never been too good at photographing miniatures. That being said, they should give an idea of what I've been doing!)

Raaargh!
I was pretty happy with the basecoat, despite how long it took. I was planning on coating it in Dip, to tie it in to the rest of my Vampire army and to help darken it further. But only after I finish all the details, so a long way to go before that stage!
The wings were supposed to look a lot lighter than the rest of the model, as they were supposed to be thin and light. I know they aren't sculpted like that, but I wanted them to look right rather than painting them as they are sculpted. Here is a wing with the red stage finished, pre-dip.

My wife doesn't understand the anatomy of this wing. I just think it looks awesome!
I then stopped taking photos during the prep stage, so I only have ones now it's finished. There were a hell of a lot of details than needed doing once the basic skin tone and scales were done, including bone for the teeth, horns and claws, and the eyes and mouth too. These little details took quite some time, but after they were done I applied the Dip. This was the biggest point where it could go wrong, and I was worried as I started to brush on the dip. I needn't have worried though, as it all turned out ok in the end, as you can see in the below pictures.


I have to say that I'm very happy with how it turned out! The stone you can see in the last photo lifts out, leaving room for the Vampire Lord to stand on the base. I felt that this was the best way to incorporate the rider into the model, as I didn't fancy ruining such a nice figure by trying to attach a rider to it's back.
After this model was finished, I looked around my painting desk for another project. My eyes fell on my half finished Ogre Maneaters. I had started to put together a unit of 6 with 2 pistols each, and then left them as I wasn't sure my skills were up to the task. With confidence brimming after finishing the dragon above, I decided I would have a go.
Ogre Maneaters
The idea that I had for this unit was to make them look like Wild West gunslingers. Back when I first started to build these figures, I had tried to sculpt stetson hats for them to wear and this was hard. I found it so tricky, that I put the unit on the side and gave up on the idea of putting coats or cloaks on them. This was where they were when I came back to them. I haven't really tried to use green stuff in this way before, so I scoured the internet for some ideas on how to do what I wanted to. My first attempt is shown below:

I was actually rather pleased with this!
Emboldened by this modest success, I moved on to the next one:

Again, not too bad! The unfortunate line across the bottom was from a fold in the green stuff, but it should be covered once it is painted. I tried a slightly different look for this, putting the fold in the other side. I wanted to ensure that they were all different, and this should give me a way to do this.
2 down, 4 to go. I had posted these first two on Twitter, and the suggestion was to try and make the folds more obvious. I attempted this on the next one:

With this one I thought I had got the hang of it. I was really happy with this one. The extra definition in the fold made a difference, and I put more effort into the folds for the last 3.
Here's number 4 - though my ham-fistedness is starting to show...

Number 5 turned out rather similarly too. However, once I got to the final one I ran into difficulties. As I used the arm from the Thundertusk that had the vulture on, part of the cloak was already on the model, and when I tried to get it to match it looked a little odd...

I really wasn't happy with this, a needed bump back down to Earth for my sculpting ability!
Here are the completed maneaters, complete with hats and cloaks:


I have also managed to put some paint on these now, so there are a few photos below of the finished unit:


For my first real attempt at sculpting, I'm rather pleased with how the unit looks! My favourite is definitely the one with the long rifle, but whether this is to do with his cloak, his hat or his gun I'm not too sure.
Ogre Firebelly
I've wanted to add a second Firebelly to my Ogre army for a while. They are very useful models, and whilst I really like the stock figure, I didn't want two of them in my army. Having searched Google for some ideas for an alternate Firebelly model, I ran across the below on the Ogre Stronghold:

|

First up, I needed to learn how to sculpt fire. Fortunately there is an excellent tutorial on the Tale of 4 Geeks website. I tried this out on the weapon first, and here are the first results:

I also put a cloak on him (naturally!

Dodgy photo I know. But as I've said, photography isn't my strongest point...
Despite the photo, the weapon actually looks pretty good. I also added a final fireball to his left hand. I let it all dry and then moved on to the other parts of the model. I wanted to add some extra bits to his clothing, and then I had to do his hair. Here is the next photo:

You get a better view of the work so far here. The hair isn't finished, but the rest is just about there. The final part was to wait until it had dried a little, then add the lines to the hair to make it look like it is actually hair!
Here is the final figure before paint is applied:

I decided not to add the 'cage' around the back of his neck, I thought that the cloak I added would give enough detail to his back. The rest is very similar to the original picture, and I give full credit to the original sculptor for all the assistance his pictures gave me.
I then moved on to painting him. The skin was rather straight-forward, as it was the same as all my other ogre models. Then for the red on the rest of him, I drew on my experience from painting Blood Angels many moons ago. The hardest bit was painting the fire to look realistic, and again I have to credit the Tale of 4 Geeks site for another really useful tutorial in painting fire. I've taken some more pictures of the final result, and here they are:


I keep saying it, but I'm really pleased with how this model came together. I think he might be my favourite Ogre I've painted so far!
Bragg the Gutsman
As a finale to this particular post, I thought I'd post up some pictures of the other Ogre I've been working on. No Green Stuff on this, just the standard model from GW. Unfortunately the rules for this particular special character are so dire that I doubt I will ever field him as the character he is supposed to be. However, he will see table time either as a regular Maneater, or as a second Tyrant.


I hope you have enjoyed this look through my recent painting exploits, and as ever if you have please feel free to comment below or get in touch on Twitter.
Thanks for reading, see you soon!
No comments:
Post a Comment